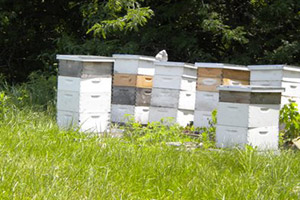
As I type this, spring may be around the corner. Hard to tell, when Monday starts with 30°F, blustery wind, snow flurries, sleet and rain, while Friday ends with 68°F and partly cloud skies. No matter. Beekeeping work must go on if one is to be ready for the real spring buildup and subsequent harvest.
My work bench is clear of the usual debris; disturbed dust motes scatter in the thin sunshine weeping through the window next to my work bench, which I have just lined with a chunk of newsprint. A battered galvanized trash can is stacked on an upturned bucket to reach the perfect height for my newest beekeeping project. My tools lie at the ready—a small recently sharpened hive tool, an awl, nail puller, tack hammer, two sizes of frame nails, a repurposed hoof pick, a wire brush, my favorite wood glue and my homemade frame setter board, (photo 1).
Have you guessed what the new project is?
No, it’s not installing new foundation or making frames; it’s not strictly devoted to repairing frames on the frame setter board, (although I will be doing a fair amount of that anyway).
Still, not sure?
Well, spring is almost here and it is time to do one of the most abhorred tasks beekeepers avoid like side steppin‘ a den of rattlesnakes—plastic frame and sheet foundation clean-up and reconditioning! Ta-da!
I know I sound a bit gleeful over a nasty, messy job, but I actually look forward to offering my bees freshly cleaned and sanitized foundation to start comb pulling during their spring buildup.
So, why put yourself through this ugly bit of beekeeping business every year?
Anyone out there heard of CCD, colony collapse disorder? Bee viruses run amok? Seen a decline in queen fertility? Had a problem with chalk brood, or European Foulbrood, or a host of other bacterium and viruses? You name the bee problem and I guarantee some of it is related to black comb over three years old.
Old inky black combs become ready-made sponges absorbing and storing pesticides, fungicides, miticides, pollutants and other “cides,” yet to be named or discovered. Foragers drag in all kinds of environmental crud just from doing their jobs. Or worse yet, you, the well-intentioned beekeeper may have put a miticide in their hives trying to control some afore-mentioned problem, which only adds to this chemical cocktail within the beehive. The once pristine white wax combs have now turned into a blackened homogeneous toxic wasteland for your newly mated, young queen to lay her eggs into. I know, I’m not paintin’ a pretty picture here.
I suggest that this yearly housekeeping chore will certainly remove one or more factors of honey bee decline in your hives. Bold talk I know. But most research over the years still agrees that by removing old black comb by the third year of bee usage helps control the spread of disease organisms, while reducing the dangerous pesticide, fungicide and miticide overload within the hive.
If this task is performed yearly, you may only be able to cull a portion of your blackest combs—those not in use. Sometimes, black comb will be filled with pollen, honey reserves, or even brand new eggs throughout the season making it difficult to replace unless a concentrated effort on your part is made to shift the frames up, down or out to the furthest edges of the brood box during the season until they are empty. Only then can they be replaced.
Let’s face it, if given a chance, the queen bee loves freshly laundered, large, wax cells to lay her eggs into.
Did I say large?
Now, for a bit of biology. Each time the queen uses and reuses brood comb, despite the cleanup efforts of the house bees to prep the comb for her next batch of eggs, the cell size diminishes. Can’t be helped. Old cocoon layers from many successive years of brood rearing remain to some extent, each decreasing the available cell size for the queen to lay in, which reduces the space available for the larvae to grow in, reducing the size of the baby bees.
If for no other reason, removing old, rock hard, black as Hades comb will give the new larvae room to grow! I want nice fat worker bees. How ‘bout you?
It’s a warmish day inside my garage, but not so much outside. National Public Radio blares in the background informing me on whatever is on their minds for the day. I work steadily. Using my sharp hive tool, I roll the wax sideways off the plastic sheet foundation into my trusty trash can, (photo 2). This wax is so black that even my solar wax melter on a 110°F day can’t find any wax left to render out, so, this black comb is total waste.
Onward—next, I use a ground down and side sharpened hoof pick to clean out the side grooves of entirely plastic frames like Pierco, or EZ Frames, or the top and bottom grooves of wooden frames, if I need to remove and reset the plastic sheet foundation for any reason, (photo 3). I also use an awl to poke out the wax moth cocoons, (photo 4), which are very fond of incubating in wooden frame pin holes.
Finally, any wax still adhering to the foundation gets the wire brush treatment, (photo 5), but at this stage the foundation has not been thoroughly cleaned of any leftover waxy cocoons or has not been sanitized against comb-borne disease spores like chalk brood or European Foulbrood. This step comes later.
While cleaning the wooden frames, I take note of any weak spots; is it wobbly at the top or bottom, side by side? This often indicates loose nails, no glue, or something broken, (I inherit or unknowingly buy a lot of poorly constructed bee boxes and frames. I usually catch up on these renegade frames during my cleanup and reconditioning each year). I repair these kinds of problems by hammering down loosened nails, re-gluing corners, or adding a nail to the side bar to keep the top bar from pulling loose as shown in photo 6 A & B.
Once this phase of cleaning is complete, I take my chore outside. You’ll want a nice warm day for this and a willing helper to man a power washer, (photo 7). Power washers run a couple of hundred bucks, so balance their usefulness against the number of colonies that you manage. If you only have a couple of colonies, a field trip to the self-help car wash, where sometimes even hot water is available to perform the following cleanup techniques will be your best bet.
Dress your helper in a waterproof apron to keep his clothes kind of dry, a face shield to protect his eyes and waterproof footwear, (photo 7). DO NOT FILL THE POWER WASHER WITH SOAP! Any soap residual could kill your bees. Just plain water in the tank will do the trick.
So, let’s get to it!
THE PROCESS:
1. Warm the scraped frames by laying them in the sun on the grass, or anywhere near where you intend to do your wash-up, (photo 8). Keep in mind this is a wet, mucky job. Water flies everywhere! Bits of cocoon wax splatters everything nearby, so, think about where you want that mess to end up even though it will eventually biodegrade.
2. Spray off the bulk of …


