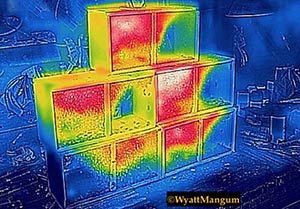
On a brief warm sunny afternoon, I hived five packages of bees (see Figure 1), knowing a cold night was coming. When I had my 50 packages, mentioned in the previous article, I hived them in two big 25-hive apiaries in two days. At the time, none of my neighboring beekeepers had ever done that. So I was on my own.
Years later, while working in the bee research program at North Carolina State University, one of the beekeeping courses provided each student with new hive equipment and a package of bees. For almost 10 years, I helped students hive their packages while troubleshooting all sorts of start-up problems.
In all those situations, I laid out the new apiaries to minimize drifting since thousands of bees could be learning their new hive locations at nearly the same time. I spread out the hives and turned them in different directions except Northwest.
As for my five package hives, they were up on the high 30-inch stands where I put my top-bar hives (see Figure 2). I inspect my top-bar hives without bending over. While I was returning to my frame hive roots with packages, I was not going to hurt my back bent over brood chambers that were essentially on the ground. Veteran beekeepers no doubt will wonder, what are you going to do when the hives are stacked high with supers? I figure I have a solution for that, which will emerge in due time.
First, understand that I do not claim the following is a comprehensive procedure on hiving a package. Rather, the description comprises the main points and crucial details of how I do it. Beekeepers corporate some of my techniques into the way they already hive packages, which is usually the way of things in beekeeping.
Before trying that, another slow way to de-can the cage is to merely lay the cage gently on its side. Then pry out the feeder can, being careful not to let it bind in the cage hole. Now the feeder-can weight does not work against its removal. After a bit of prying, draw out the feeder can enough to grasp it properly (see Figure 3). Hold on to the feeder can and turn the shipping cage upright. Now the can is ready to remove.
But when I have numerous packages to hive, I want the feeder cans out in seconds, not minutes. So my fast way is to quickly snatch the package straight up, just a few inches. Instantly, I catch the feeder can when it pops out of the hole for a split second. When I work alone with lots of packages, this quick method is a blessing. On the other hand, if the feeder cans are tight in their holes, this quick method will not work. Then I must resort to one of the slower methods. For whichever method works, as the feeder can leaves the cage, slide the cage top over the hole to keep the bees in the cage (see Figure 4).
Next comes queen cage removal. First, separate the plastic strip from the top of the cage. Next, thump the shipping cage on the ground to dislodge the bees. Then briefly open the shipping cage and give the plastic strip a couple of shakes to remove the mass of bees clinging to the queen cage. Quickly remove the queen cage, and close the shipping cage all in one motion.
No matter the number of packages I hive up, a flash of queen-hunting eagerness focuses my attention on the queen cage. The young queen at this time of her life is usually little larger than her attendant bees, assuming they are present. I also check to see that the queen is not….


